Block Attack Part 4 - Creating a Game Board and an Active Piece
Today our project will start looking more like a real game as we add the game board and our first falling piece. We will draw the game board as a 10x20 grid and then overlay our moving piece on top of that game board.
To start, we can make a quick update to blockattack.js to change our background from the stroked single row we drew previously to a 10x20 grid of gray squares.
blockattack.js
class BlockAttack {
    width = 400;
    height = 800;
    blockSize = 40;
    ...

    drawFrame() {
        const ctx = this.canvas.getContext("2d");

        // Clear the canvas
        ctx.clearRect(0, 0, this.width, this.height);

        // Draw the background
        ctx.fillStyle = "#666666";
        ctx.strokeStyle = "#333333";

        for (let x = 0; x < 10; x++) {
            for (let y = 0; y < 20; y++) {
                const blockX = x * this.blockSize;
                const blockY = y * this.blockSize;

                ctx.fillRect(blockX, blockY, this.blockSize, this.blockSize);
                ctx.strokeRect(blockX, blockY, this.blockSize, this.blockSize);
            }
        }
        ...
    }
}
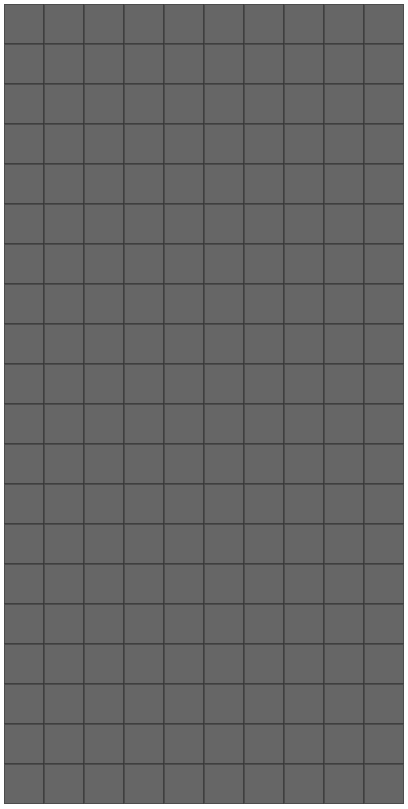
We have updated the block size from 80 pixels to 40 pixels square and we have adjusted the canvas width and height to match a 10x20 grid of 40 pixel squares. We then added a loop to drawFrame() which increments across the x axis with an inner loop that increments across the y axis. Our board (and our canvas coordinate system) begins in the upper left corner and increases to the right and down. The upper left corner is x,y position 0,0. The lower right corner is x,y position 9,19. As mentioned in an earlier post, we translate these world grid positions into screen coordinates by multiplying our x and y values by the size of each block.
Once we have calculated our blockX and blockY in the inner loop, we can draw a rectangle and put a black stroke around it. We will remove the previous code to draw a red block because we are going to add new code to render an active piece in a moment. The output from our code changes looks like this:

Now let's draw our piece. We want to create a piece that starts on the first (top) row and drops all the way to the bottom, where it stops. In our game loop, this will cause a new piece to enter the board. We will concentrate on that later. For now let's focus on handling a single active piece.
If you've played Tetris before, you will know that it has seven types of piece shapes called tetrominoes. Let's start with the "O" block or what I have always called the square. To add this piece to our system, we need to create a way to represent the block shape that can be adapted to the other block shapes which will be added later. I think a two-dimensional array with an on/off indicator in each element will suffice for now. We can use 1/0 to indicate on/off and we can size our array to match the requirements of each piece. We will also associate a specific color with each shape, so let's make that part of our shape definition as well. Our shape declaration for the "O" shape will look like this:
const oShape = {
    color: "#ffff00",
    shape: [
        [1,1],
        [1,1]
    ]
};
Yes, it's very simple and probably naive, but it should work for now. Let's see how we can integrate this into our drawFrame() method:
blockattack.js
const oShape = {
    color: "#ffff00",
    shape: [
        [1,1],
        [1,1]
    ]
};

class BlockAttack {
    ...
    activePiece = oShape;
    ...

    drawFrame() {
        ...
        // Draw the active piece
        ctx.fillStyle = this.activePiece.color;

        for (let x = 0; x < this.activePiece.shape.length; x++) {
            var xRow = this.activePiece.shape[x];

            for (let y = 0; y < xRow.length; y++) {
                const blockX = x * this.blockSize;
                const blockY = y * this.blockSize;

                ctx.fillRect(blockX, blockY, this.blockSize, this.blockSize);
                ctx.strokeRect(blockX, blockY, this.blockSize, this.blockSize);
            }
        }
        ...
    }
}
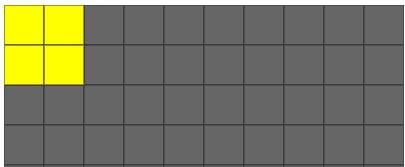
First, we specify a data structure that represents our "O" shape attributes, which include its color and shape. Then, we add the "activePiece" member variable to the BlockAttack class. This will be used to track the currently active piece in our game loop. Last, we add the code to update the fill color and then loop over the "O" shape declaration and draw a yellow block for each "on" value in the two dimensional array shape description. You may have noticed that this drawing procedure shares a lot in common with the method we used to draw our background grid. At the end of this post, we will refactor these methods to use some common code.

It's important to note here that we are mapping position [0][0] in our shape description to coordinate {0,0} in our board grid. Right now we assume that the piece is in the uppper left position of the board, but when the position changes, we will need to apply a translation to move our piece into the right position on the game grid. We will get to that shortly. Also, it is important to note that we are drawing the piece after we have drawn the background grid. We need to draw from lowest (background) layer to highest (foreground) layer because every time we draw to the canvas, we draw over whatever graphics are already in that location. If we draw from back to front, we are guaranteed to present the graphics as we intended.
Now, to move forward with animating our piece's movement in the grid, we need to store the position of the block and update that position using the same method we used in previous posts to animate the red block. We also need to establish a starting position for the piece. My guess is that this starting position might be slightly different for each shape type, so we will make this part of the shape definition.
Several changes are required to support the addition of a start position and an active position in the grid.
blockattack.js
const oShape = {
    color: "#ffff00",
    shape: [
        [1,1],
        [1,1]
    ],
    startPosition: 4
};

class BlockAttack {
    ...
    activePiecePosition = { x: oShape.startPosition, y: 0 };
    activePiece = oShape;
    ...
    updateState(timestamp) {
        ...
        if (timeDiff >= 500) {
            if (this.canActivePieceMoveDown()) {
                this.activePiecePosition.y++;
            }

            this.lastBlockMoveTimestamp = timestamp;
        }
        ...
    }

    canActivePieceMoveDown() {
        let maxShapeY = 0;

        for (let x = 0; x < this.activePiece.shape.length; x++) {
            const xRow = this.activePiece.shape[x];

            for (let y = 0; y < xRow.length; y++) {
                if (xRow[y] === 1) {
                    maxShapeY = y;
                }
            }
        }

        return (maxShapeY + this.activePiecePosition.y) < 19;
    }

    drawFrame() {
        for (let x = 0; x < this.activePiece.shape.length; x++) {
            var xRow = this.activePiece.shape[x];

            for (let y = 0; y < xRow.length; y++) {
                const blockX = (this.activePiecePosition.x + x) * this.blockSize;
                const blockY = (this.activePiecePosition.y + y) * this.blockSize;

                ctx.fillRect(blockX, blockY, this.blockSize, this.blockSize);
                ctx.strokeRect(blockX, blockY, this.blockSize, this.blockSize);
            }
        }

        window.requestAnimationFrame((timestamp) => this.tick(timestamp));
    }
}
The important changes to note here are:
- A starting position has been added to the oShape class so that we know where to place the piece on game startup.
- A new "activePosition" member variable has been added which is an object that contains two properties: an x and y. These x and y positions are in terms of game board grid coordinates.
- updateState() has been updated with a new time span (500ms) and it uses canActivePieceMoveDown() to determine if moving down is a valid move. The logic in canActivePieceMoveDown() will likely be generalized later into something like canActivePieceMoveToPosition() but for now we will keep it specific to our immediate needs. We prevent the piece from moving off the board with this logic.
- Lastly, we update the drawFrame() method to use this.activePiecePosition to translate the coordinates into the current position in the game grid.
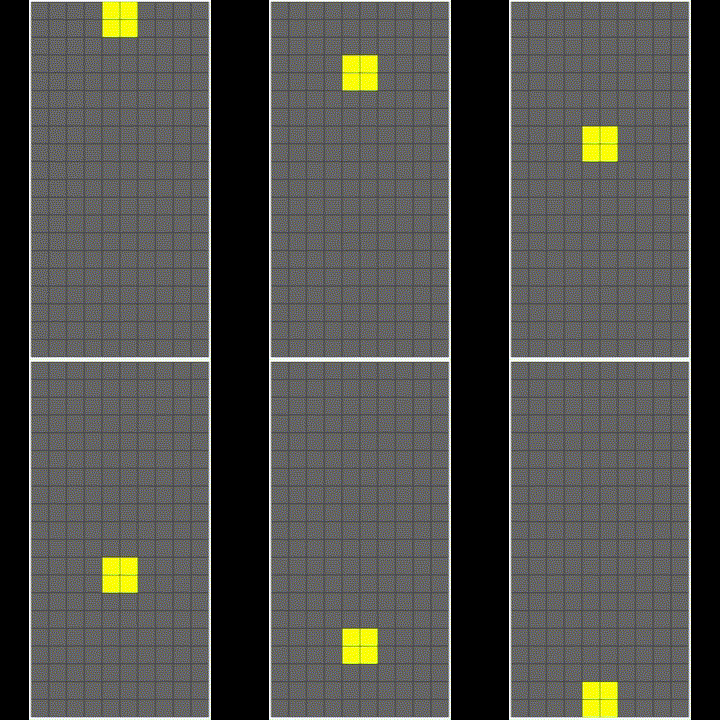
Our results show a yellow "O" shape which enters the board at the top and moves downward until reaching the bottom of the board.

Finally, I would like to refactor the drawFrame() method so that it uses a reusable method called drawBlock(). Here is the updated code that refactors our fillRect and strokeRect calls into a common drawBlock() method:
blockattack.js
drawFrame() {
    const ctx = this.canvas.getContext("2d");

    // Clear the canvas
    ctx.clearRect(0, 0, this.width, this.height);

    // Draw the background
    for (let x = 0; x < 10; x++) {
        for (let y = 0; y < 20; y++) {
            this.drawBlock(ctx, x, y, '#666666');
        }
    }

    // Draw the active piece
    for (let x = 0; x < this.activePiece.shape.length; x++) {
        var xRow = this.activePiece.shape[x];

        for (let y = 0; y < xRow.length; y++) {
            this.drawBlock(ctx,
                (this.activePiecePosition.x + x),
                (this.activePiecePosition.y + y),
                this.activePiece.color
            );
        }
    }

    window.requestAnimationFrame((timestamp) => this.tick(timestamp));
}

drawBlock(ctx, gridX, gridY, colorCode) {
    ctx.fillStyle = colorCode;
    ctx.strokeStyle = '#333333';

    const blockX = gridX * this.blockSize;
    const blockY = gridY * this.blockSize;

    ctx.fillRect(blockX, blockY, this.blockSize, this.blockSize);
    ctx.strokeRect(blockX, blockY, this.blockSize, this.blockSize);
}
Our drawBlock() method allows us to draw a block anywhere in the game board grid. It's important to note that the arguments passed to this method are in terms of the game board grid. They are then translated to canvas pixel locations inside the drawBlock() method.
This seems like a good place to stop for today. We have added a background game board, an active piece, and some very basic collision detection. We have started to generalize some of our drawing with the help of our drawBlock() method and we are in a great position to add the rest of the shapes to the game. Next time we will add the remaining shapes and implement a game over condition.
BlockAttack Repository commit for this blog post.
Play the Latest Version of BlockAttack at PlayBlockAttack.com
Thank you for reading!